
引言
前面为了项目能更好的使用,也是做了非常多的铺垫,又是生成api文档,又是log4j日志。现在回到正题,Sequelize来操作我们的mysql数据库。
本小节分为:
(1)单条数据/多条数据新增
(2)单条修改/批量修改
(3)数据删除
(4)数据查询
单条数据/多条数据新增
(1)单条数据新增
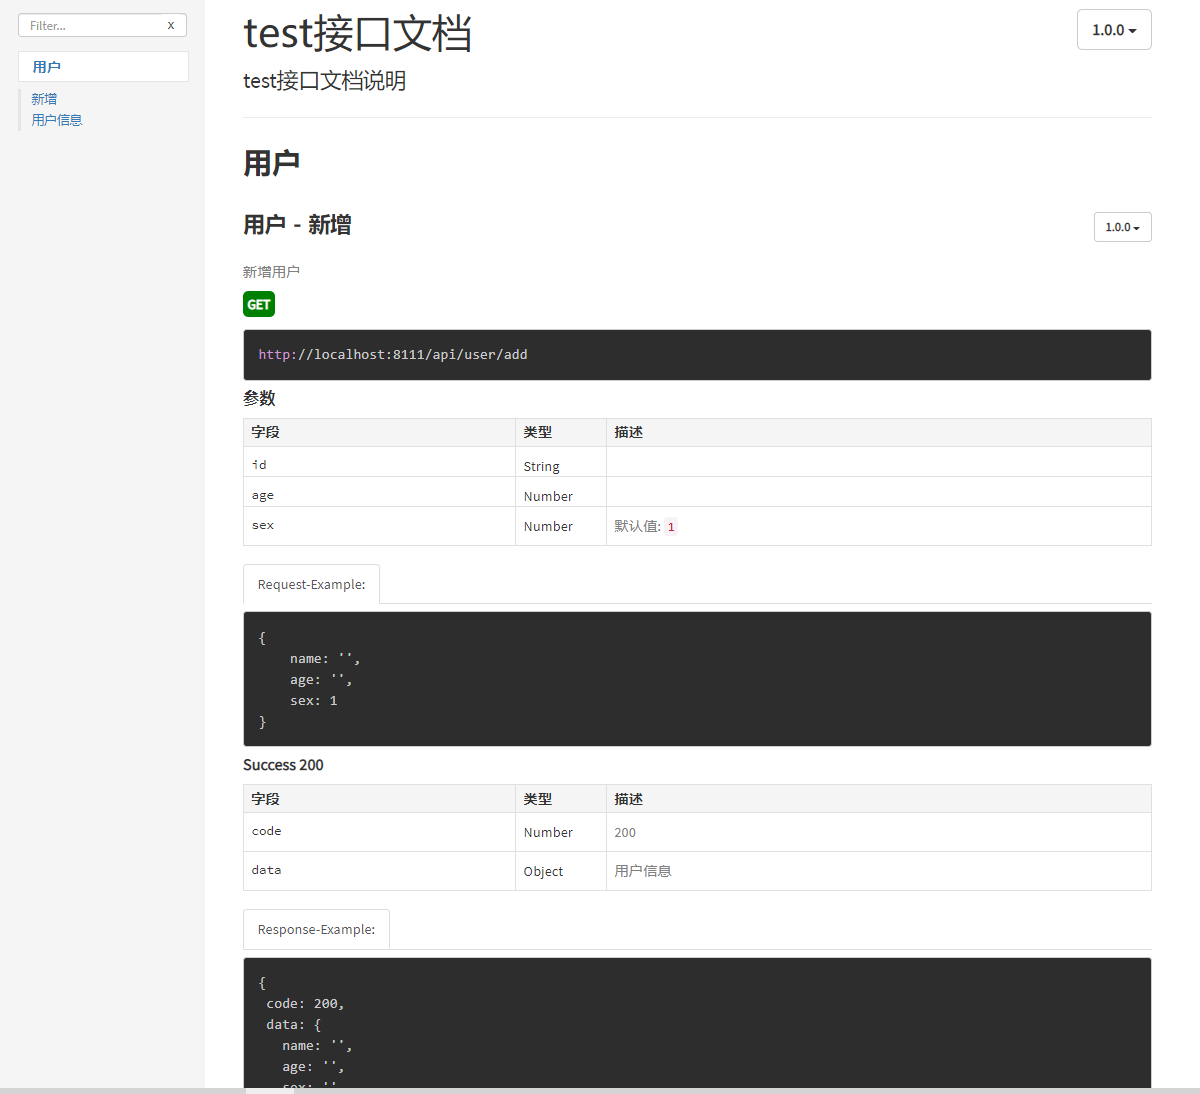
继续在router/user.js上面写测试接口实现新增
/**
 *
 * @api {get} /api/user/add 新增
 * @apiName 新增
 * @apiGroup 用户
 * @apiDescription 新增用户
 * @apiVersion  1.0.0
 *
 * @apiParam {String} id=''
 * @apiParam {Number} age=''
 * @apiParam {Number} sex=1
 *
 * @apiParamExample  {type} Request-Example:
 * {
 *     name: '',
 *     age: '',
 *     sex: 1
 * }
 *
 * @apiSuccess {Number} code 200
 * @apiSuccess {Object} data 用户信息
 * @apiSuccessExample {type} Response-Example:
 * {
 *  code: 200,
 *  data: {
 *    name: '',
 *    age: '',
 *    sex: '',
 *    ...
 *  }
 * }
 *
 */
router.get('/add', async (req, res) => {
  const params = req.body;

  let data = await userDB.create({
    name: params.name,
    age: params.age,
    sex: params.sex,
  })
  res.send({
    code: 200,
    data: data
  })
})
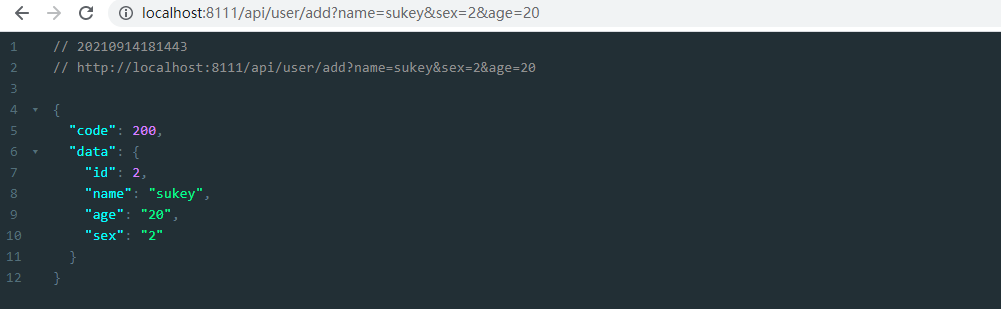
浏览器调用接口测试
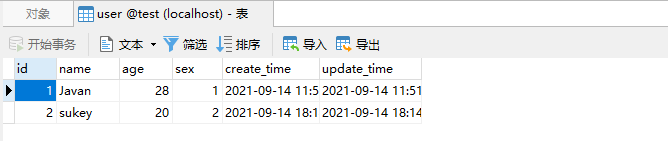
数据库数据
(2)多条数据批量新增
/**
 *
 * @api {get} /api/user/add-group 批量新增
 * @apiName 批量新增
 * @apiGroup 用户
 * @apiDescription 批量新增用户
 * @apiVersion  1.0.0
 *
 * @apiSuccess {Number} code 200
 * @apiSuccess {Object} data 用户信息
 * @apiSuccessExample {type} Response-Example:
 * {
 *  code: 200,
 * }
 *
 */
 router.get('/add-group', async (req, res) => {
  const params = req.body;
  let userList = [{
    name: 'dom',
    age: 28,
    sex: 1
  }, {
    name: 'jerry',
    age: 26,
    sex: 2
  }]
  let data = await userDB.bulkCreate(userList)
  res.send({
    code: 200,
    data: data
  })
})
由于get请求不好传入数组,我们也就在接口里面写死数据,接口测试一下:
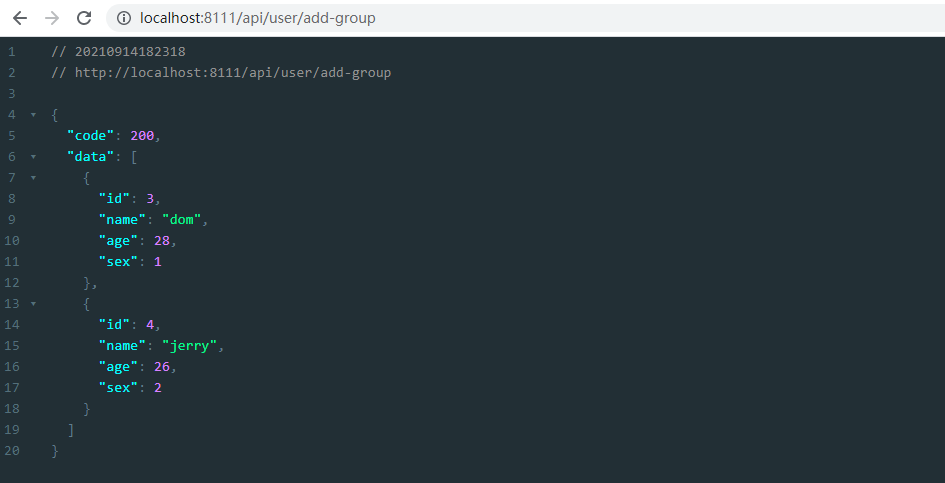
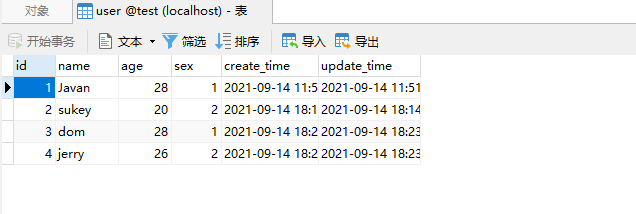
完全OK,我们修改数据。
单条修改/批量修改
(1)、单条修改
/**
 *
 * @api {get} /api/user/update 修改
 * @apiName 修改
 * @apiGroup 用户
 * @apiDescription 修改用户
 * @apiVersion  1.0.0
 *
 * @apiParam {String} id=''
 * @apiParam {String} name=''
 * @apiParam {Number} sex=''
 * @apiParam {Number} age=''
 *
 * @apiParamExample  {type} Request-Example:
 * {
 *     id: 1,
 *     sex: 20,
 * }
 *
 * @apiSuccess {Number} code 200
 * @apiSuccess {Object} data 用户信息
 * @apiSuccessExample {type} Response-Example:
 * {
 *  code: 200,
 *  data: {
 *    name: '',
 *    age: '',
 *    sex: '',
 *    ...
 *  }
 * }
 *
 */
 router.get('/update', async (req, res) => {
  const params = req.body;

  if(!params.id){
    utils.sendError(res, '用户ID不能为空')
    return
  }

  let upParams = {}
  if(params.name){
    upParams.name = params.name
  }
  if(params.age){
    upParams.age = params.age
  }
  if(params.sex){
    upParams.sex = params.sex
  }

  let data = await userDB.update(upParams, {
    where: {
      id: params.id
    }
  })
  res.send({
    code: 200,
    data: data
  })
})
接口的意思是,传入id,同时可以传入name,sex, age,根据id修改对应的name,sex, age数据,调用接口测试:
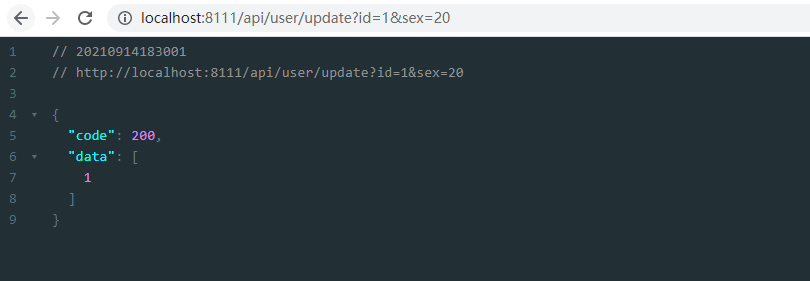
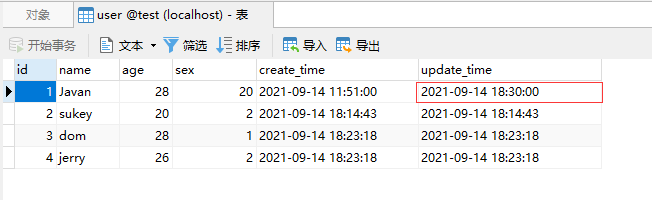
修改了用户id为1的sex=20,数据库已经改成功
好像忘记了点啥,sex怎么会是20了?改错了,改回去。
(2)、批量修改
/**
 *
 * @api {get} /api/user/update-group 批量修改
 * @apiName 批量修改
 * @apiGroup 用户
 * @apiDescription 批量修改用户
 * @apiVersion  1.0.0
 *
 * @apiSuccess {Number} code 200
 * @apiSuccess {Object} data 用户信息
 * @apiSuccessExample {type} Response-Example:
 * {
 *  code: 200,
 * }
 *
 */
 router.get('/update-group', async (req, res) => {
  const params = req.body;
  let userList = [{
    id: 1,
    age: 26,
    sex: 1
  }, {
    id: 2,
    age: 26,
    sex: 2
  }]
  let data = await userDB.bulkCreate(userList, {updateOnDuplicate:['age', 'sex']})
  res.send({
    code: 200,
    data: data
  })
})
细心的小伙伴,应该发现了,这里批量修改和批量新增用的是同一个方法,是的。不同的区别是多传了一个参数,updateOnDuplicate,意思是在插入的时候如果主键冲突就执行更新操作。更新字段就是后面的数组['age', 'sex']。
我们调用接口,看下图:
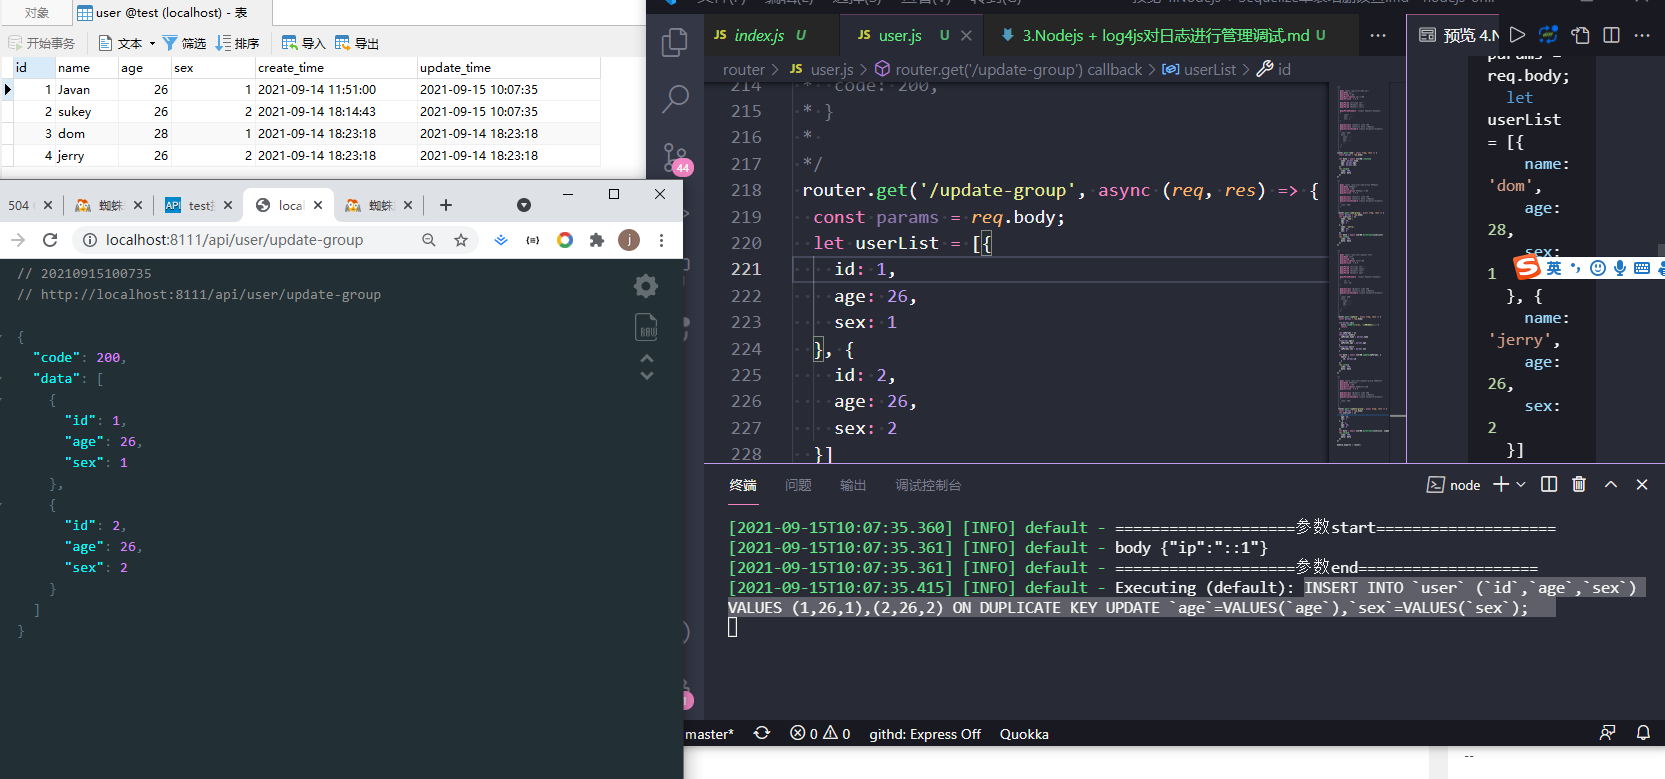
打印的SQL:
INSERT INTO `user` (`id`,`age`,`sex`) VALUES (1,26,1),(2,26,2) ON DUPLICATE KEY UPDATE `age`=VALUES(`age`),`sex`=VALUES(`sex`);
数据删除
数据删除就非常简单了
/**
 *
 * @api {get} /api/user/del 删除
 * @apiName 删除
 * @apiGroup 用户
 * @apiDescription 删除用户
 * @apiVersion  1.0.0
 *
 * @apiParam {String} id=''
 *
 * @apiParamExample  {type} Request-Example:
 * {
 *     id: 1
 * }
 *
 * @apiSuccess {Number} code 200
 * @apiSuccess {Object} message 提示信息
 * @apiSuccessExample {type} Response-Example:
 * {
 *  code: 200,
 *  message: '删除成功'
 * }
 *
 */
 router.get('/del', async (req, res) => {
  const params = req.body;

  if(!params.id){
    utils.sendError(res, '用户ID不能为空')
    return
  }

  let data = await userDB.destroy({
    where: {
      id: params.id
    }
  })
  res.send({
    code: 200,
    data: data
  })
})
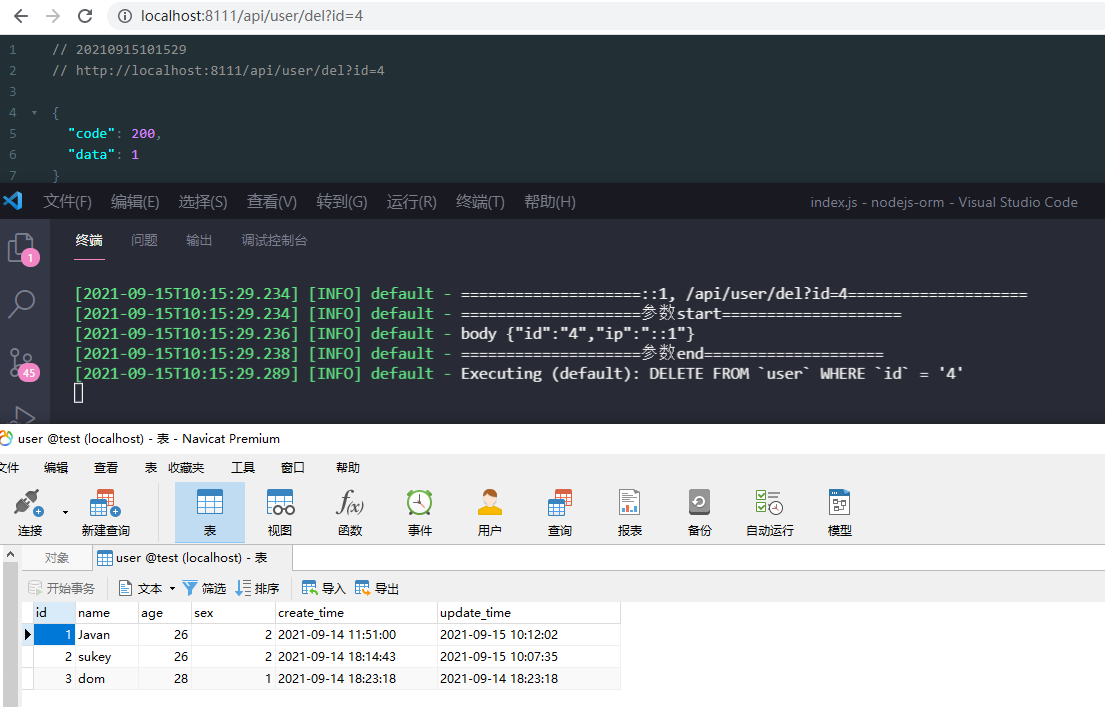
传入id,执行destroy方法即可。
当然,也可以批量删除,只需用简单修改一下即可
const { Op } = require("sequelize")
...
let data = await userDB.destroy({
  where: {
    id: {
      [Op.in]: [2,3,4,...]
    }
  }
})
这里的 Op 可以适用各种运算符,对应关系如下:
[Op.and]: {a: 5}           // 且 (a = 5)
[Op.or]: [{a: 5}, {a: 6}]  // (a = 5 或 a = 6)
[Op.gt]: 6,                // id > 6
[Op.gte]: 6,               // id >= 6
[Op.lt]: 10,               // id < 10
[Op.lte]: 10,              // id <= 10
[Op.ne]: 20,               // id != 20
[Op.eq]: 3,                // = 3
[Op.not]: true,            // 不是 TRUE
[Op.between]: [6, 10],     // 在 6 和 10 之间
[Op.notBetween]: [11, 15], // 不在 11 和 15 之间
[Op.in]: [1, 2],           // 在 [1, 2] 之中
[Op.notIn]: [1, 2],        // 不在 [1, 2] 之中
[Op.like]: '%hat',         // 包含 '%hat'
[Op.notLike]: '%hat'       // 不包含 '%hat'
[Op.iLike]: '%hat'         // 包含 '%hat' (不区分大小写)  (仅限 PG)
[Op.notILike]: '%hat'      // 不包含 '%hat'  (仅限 PG)
[Op.regexp]: '^[h|a|t]'    // 匹配正则表达式/~ '^[h|a|t]' (仅限 MySQL/PG)
[Op.notRegexp]: '^[h|a|t]' // 不匹配正则表达式/!~ '^[h|a|t]' (仅限 MySQL/PG)
[Op.iRegexp]: '^[h|a|t]'    // ~* '^[h|a|t]' (仅限 PG)
[Op.notIRegexp]: '^[h|a|t]' // !~* '^[h|a|t]' (仅限 PG)
[Op.like]: { [Op.any]: ['cat', 'hat']} // 包含任何数组['cat', 'hat'] - 同样适用于 iLike 和 notLike
[Op.overlap]: [1, 2]       // && [1, 2] (PG数组重叠运算符)
[Op.contains]: [1, 2]      // @> [1, 2] (PG数组包含运算符)
[Op.contained]: [1, 2]     // <@ [1, 2] (PG数组包含于运算符)
[Op.any]: [2,3]            // 任何数组[2, 3]::INTEGER (仅限PG)
[Op.col]: 'user.organization_id' // = 'user'.'organization_id', 使用数据库语言特定的列标识符, 本例使用 PG
运用范围,增删改查都可以,后面我们也会有很多地方用到,这里就提前列出。
数据查询
其实在第一节,里面我们已经看到了查询方法findAll(),其实还有findOne()、findAndCountAll(),它们都有各自的用意。
findOne
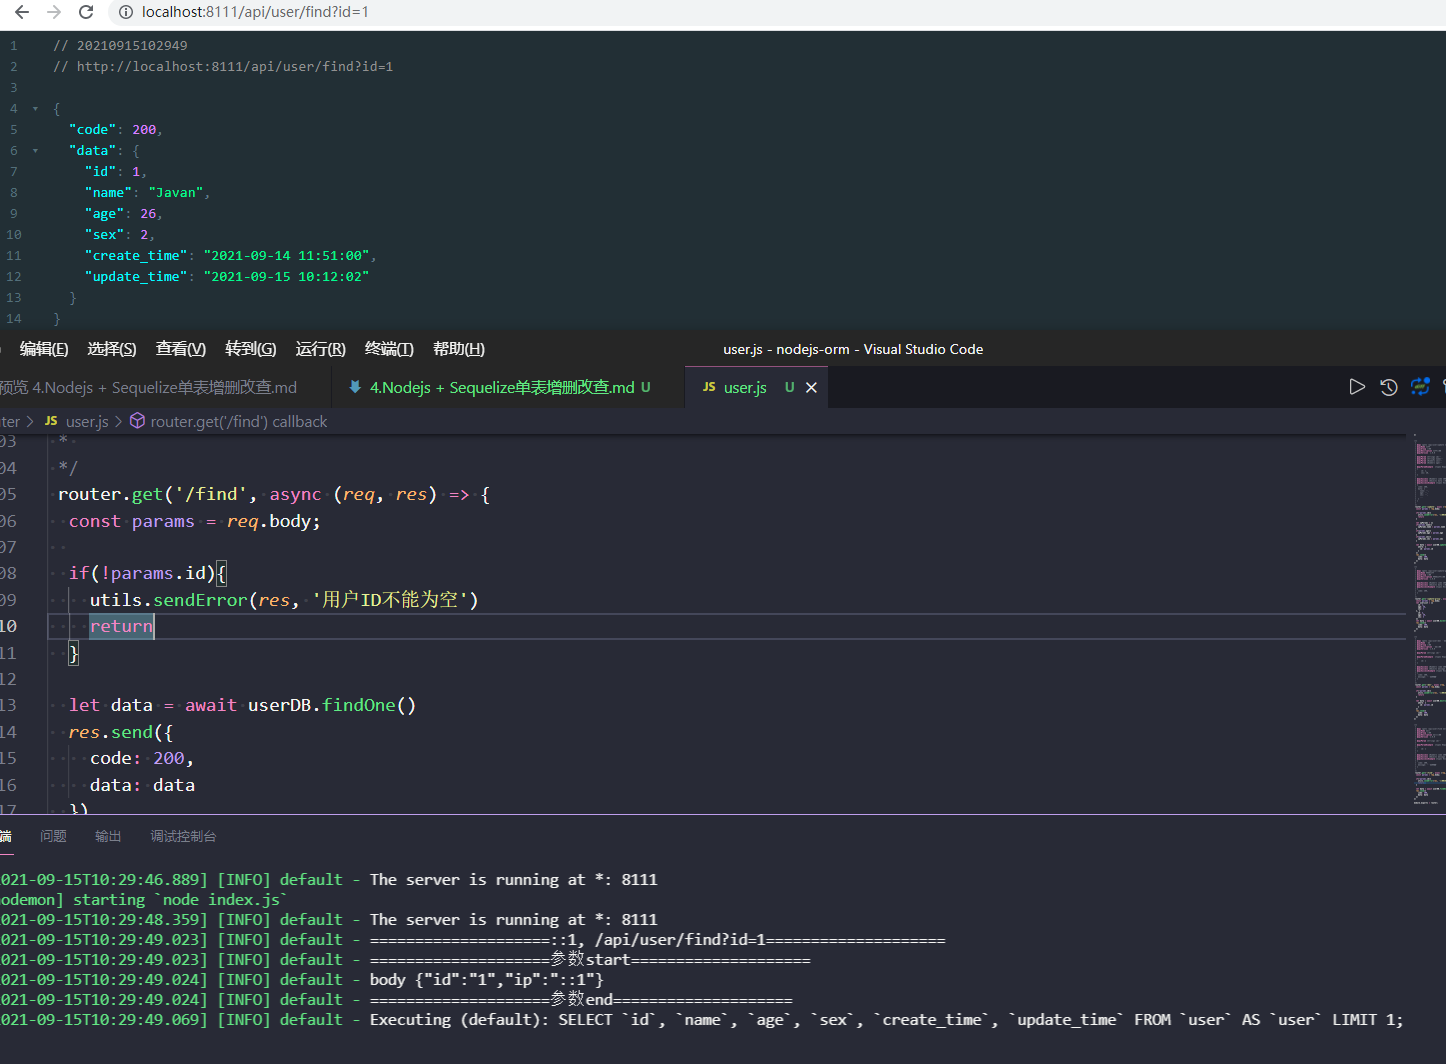
findOne获取单条数据,如果多条满足条件,默认返回第一条
let data = await userDB.findOne()
let data = await userDB.findOne({
  where: {
    id: params.id
  }
})
返回与参数id相等的数据,没有返回null
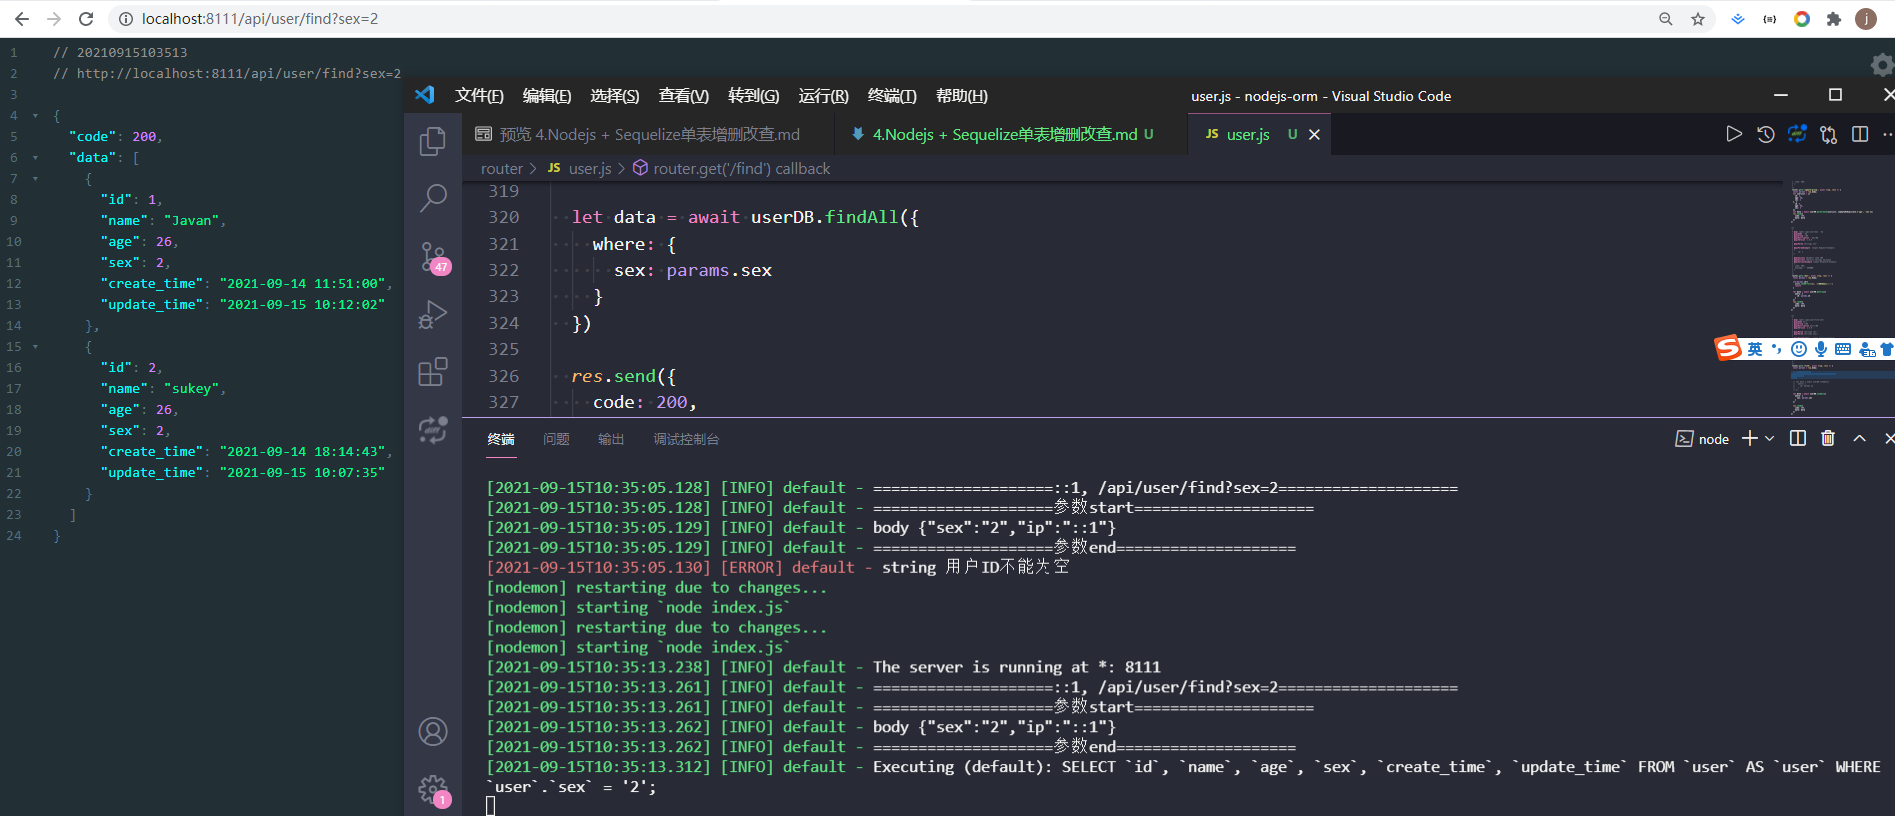
findAll
findAll返回所有满足条件的数据,常用于不需要分页的数据接口
let data = await userDB.findAll({
  where: {
    sex: params.sex
  }
})
findAndCountAll
findAll返回所有满足条件的数据和总条数,常用于需要分页的数据接口
/**
 *
 * @api {get} /api/user/list 列表
 * @apiName 列表
 * @apiGroup 用户
 * @apiDescription 用户列表
 * @apiVersion  1.0.0
 *
 * @apiParam {String} sex=''
 * @apiParam {String} pageNo=''
 * @apiParam {String} pageSize=''
 *
 * @apiParamExample  {type} Request-Example:
 * {
 *     pageNo: 1,
 *     pageSize: 10,
 * }
 *
 * @apiSuccess {Number} code 200
 * @apiSuccess {Array} resultList 数据集合
 * @apiSuccess {Object} paging 分页信息
 * @apiSuccessExample {type} Response-Example:
 * {
 *  code: 200,
 *  resultList: [],
 *  paging: {
 *    pageNo: 1,
 *    pageSize: 10,
 *    totalCount: 12,
 *    totalPage: 2
 *  }
 * }
 *
 */
 router.get('/list', async (req, res) => {
  const params = req.body;

  let {pageNo=1, pageSize=10} = params
  let offset = (pageNo - 1) * pageSize

  let where = {}
  if(params.sex){
    where.sex = params.sex
  }
  let {rows, count} = await userDB.findAndCountAll({
    offset: offset,
    limit: pageSize,
    where: where
  })

  res.send({
    code: 200,
    resultList: rows,
    paging: {
      pageNo: pageNo,
      pageSize: pageSize,
      totalCount: count,
      totalPage: Math.ceil(count / pageSize)
    }
  })
})
新写一个接口,分页查询user
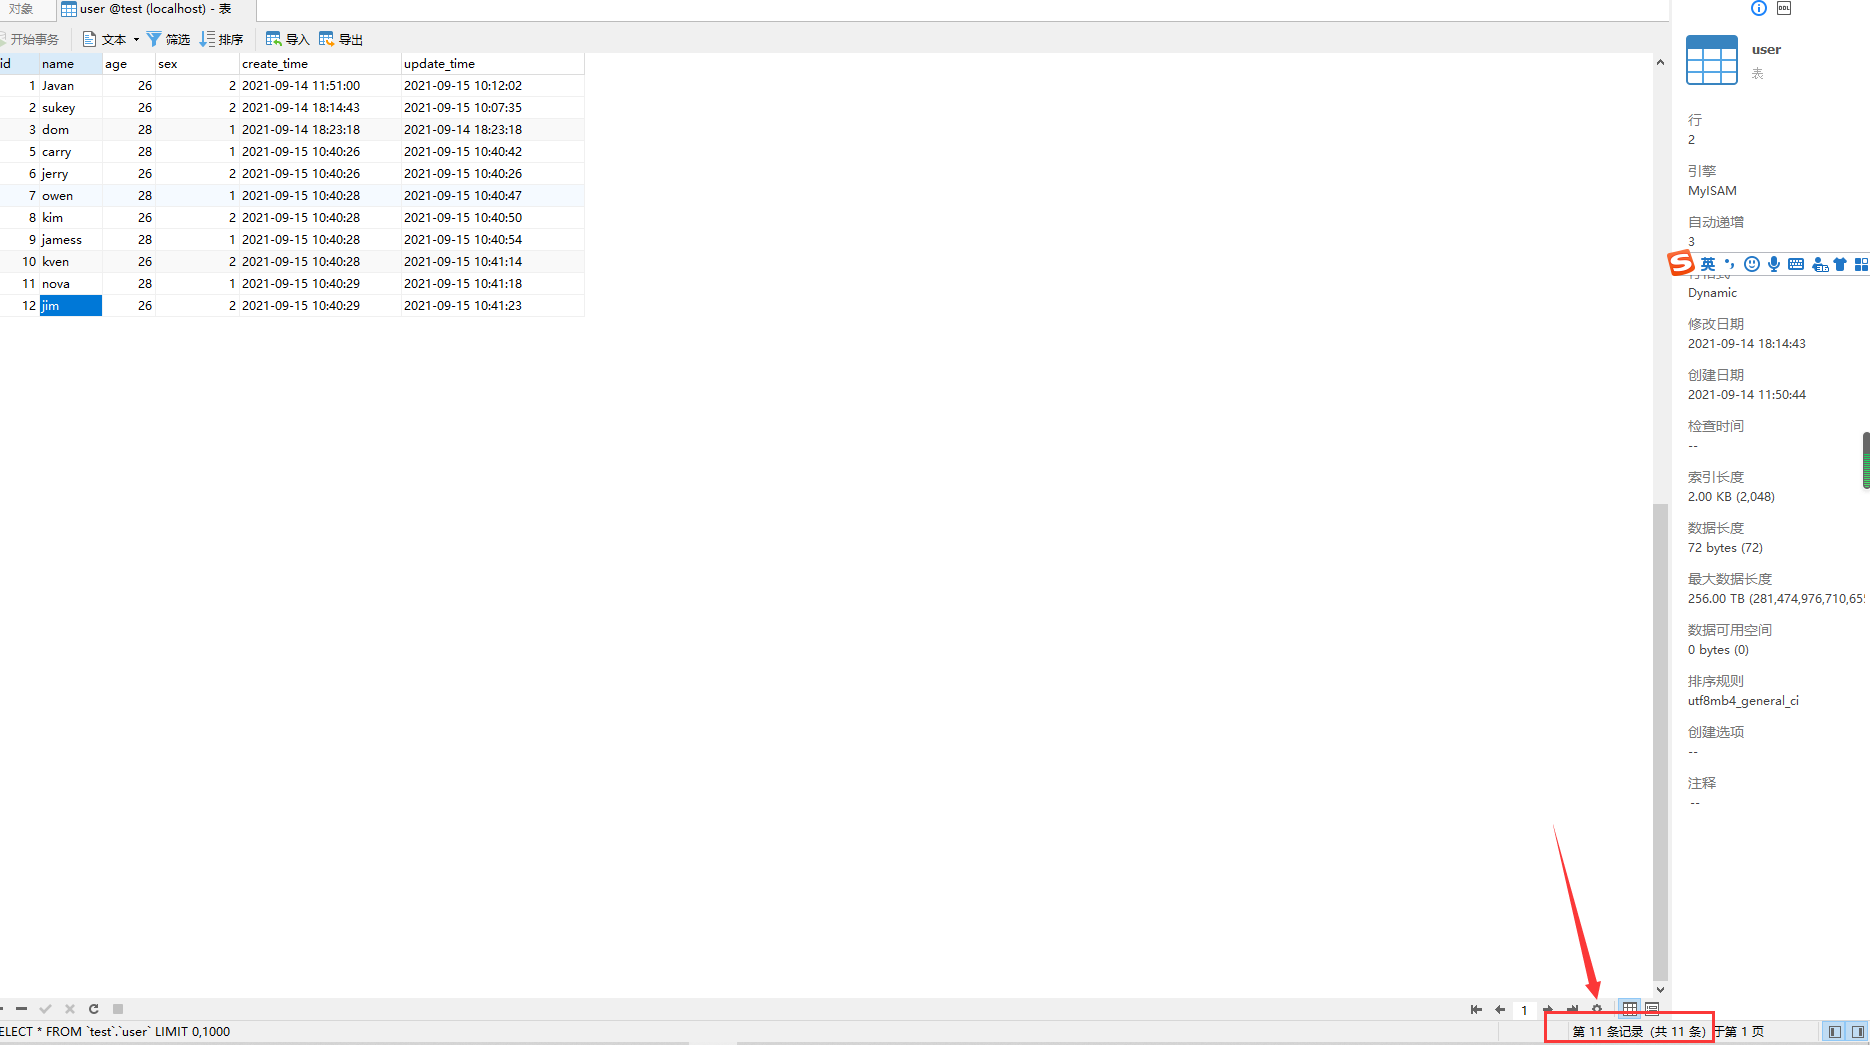
为了分页,我增加了一些数据,现在有11条,为什么下标变为了12?
因为我们先删除了id=4的数据了
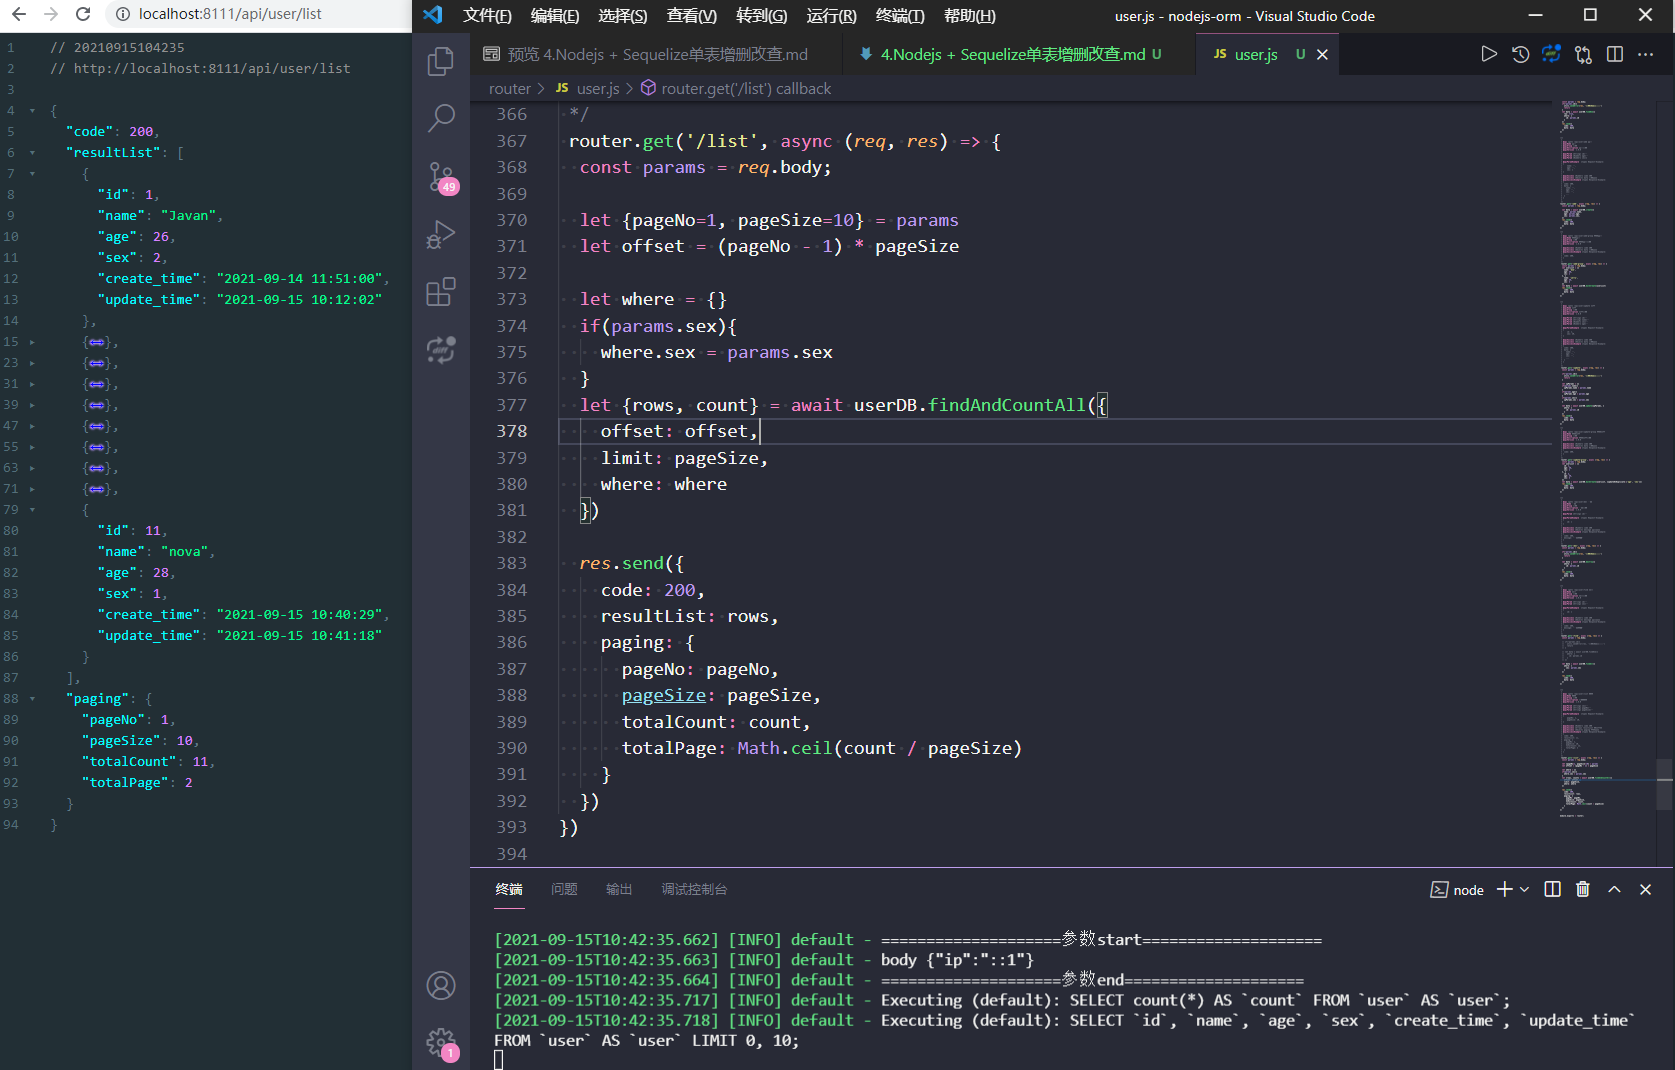
调用接口,返回了第一页数据,这时我们是没有传参数的,代码里面有默认值,默认pageNo=1,pageSize=10
控制台打印了2条sql,也就是说findAndCountAll方法,其实是分解为两步了
SELECT count(*) AS `count` FROM `user` AS `user`;
SELECT `id`, `name`, `age`, `sex`, `create_time`, `update_time` FROM `user` AS `user` LIMIT 0, 10;
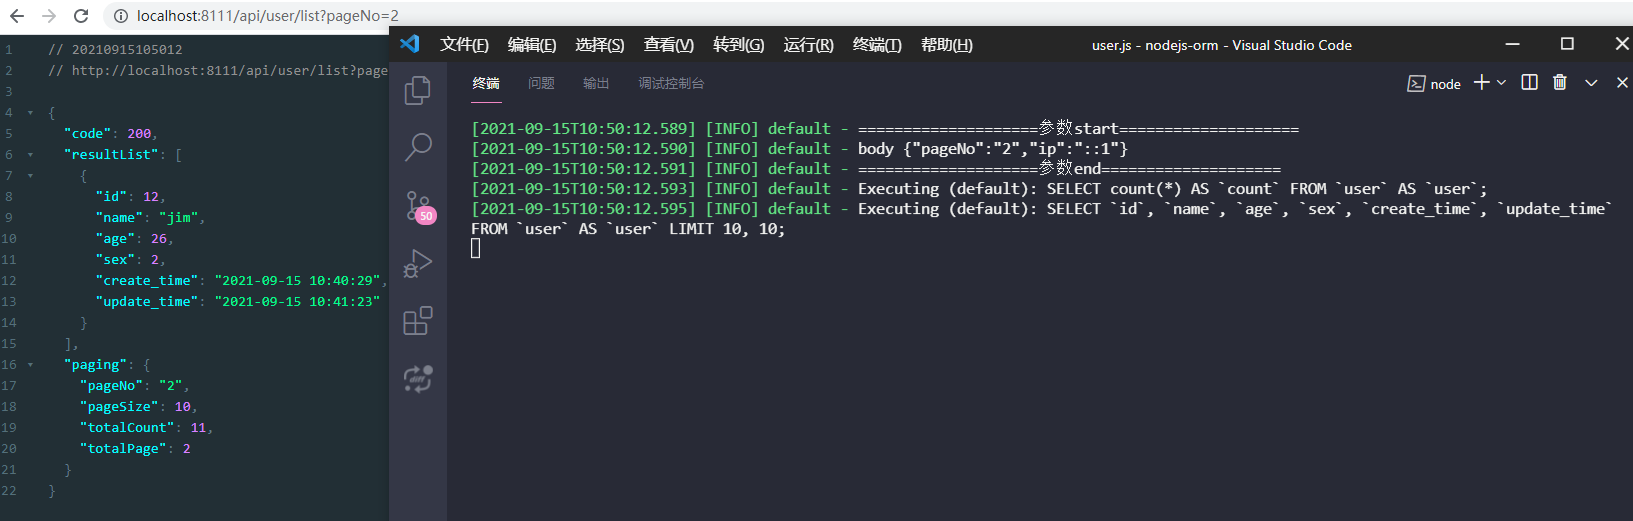
再次调用接口,我们传入参数pageNo=2,返回的就是第二页数据了。
然后我们再试试传入pageNo,pageSize, sex三个参数,返回结果也ok。
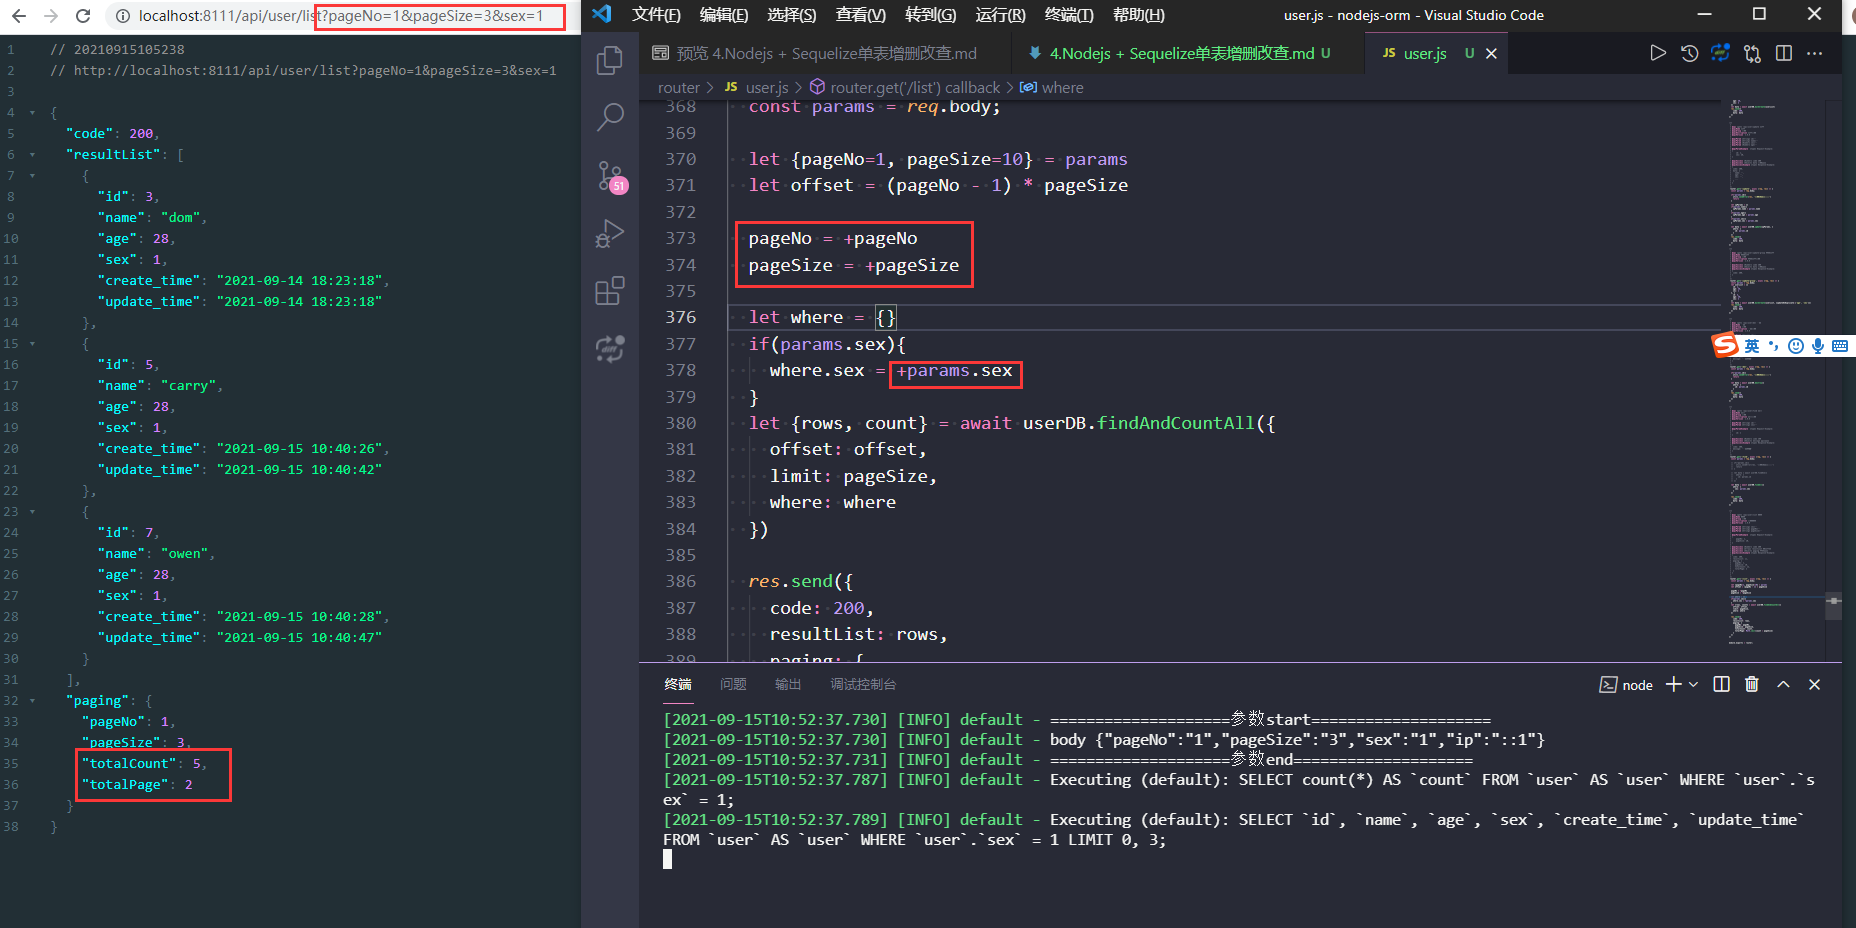
把数据sex=1的数据分为了2页,共5条数据。
小结
增删改查,最基本的操作我们都学习了,相信大家都所有收获,再来回顾一下,用到的方法:
1、create()新增一条数据,并返回新增的数据;
2、blukCreate()
(1)默认批量新增数据,返回新增的数据
(2)传入updateOnDuplicate参数,为在插入的时候如果主键冲突就执行更新操作,返回更新或新增的数据
3、update()根据条件更新数据;
4、destroy()根据条件删除数据;
5、findOne()返回满足条件的第一条数据
6、findAll()返回满足条件的所有数据
7、findAndCountAll()返回满足条件的所有数据和总条数,用于分页

 表情
表情